

Learn how to use a very simple and efficient service called ServerPilot for provisioning a web server to host your next PHP project or blog.
Provisioning a well-configured web server for a PHP application is not an easy task. You can have experience doing that, but this is not my strongest skill, I admit. So I’m always looking for new services and tools to make this job easier for me, and faster.
I’m a big fan of Laravel Forge and the company I run for years was (and is) a very happy Forge customer. Unfortunately, my goal, for now, was to find a place to host my blog, after some changes I’ve made in the last weeks.
I run my blog using Jekyll and GitHub Pages for years, but I was writing less then I expect. I like the WordPress platform, and mainly writing on its editor, so I decided to move back to WP. Then I create a new droplet on DigitalOcean using their LAMP box. The droplet was running well, but sometimes Apache could not handle everything well, then I needed to add an NGINX reverse-proxy to make things easier. There’s when I discovered ServerPilot.
ServerPilot
ServerPilot is a simple and efficient service that works provisioning a web-server for PHP and WordPress applications in a very performed way. Basically, you have to create a VPS instance on any company you want, like DigitalOcean, Linode, Vultr, etc.
Then just tell ServerPilot the server ip and root password. It will start provisioning the server using NGINX as a reverse-proxy, Apache as web-server for PHP – it installs PHP 5.4, 5.5, 5.6, 7.0, 7.1 and 7.2, so you can choose which app is gonna use which PHP version –, and MySQL. Everything very well-configured, and very fast.
The service has currently three different plans: Free, Coach and Business. They have some differences, like stats, easy SSL support, number of SSH users, etc. The point here is that the server is yours because you have full control over your VPS instance. So for me, the free tier would be enough and anything else I would configure manually if necessary.
My case is simpler because I needed a LAMP stack with NGINX as reverse-proxy and SSL support, nothing more. The previous instance I had on DigitalOcean I already configured SSL using LetEncrypt, and it was working well, so I’d like to move my SSL certificates to the new server.
Creating the server
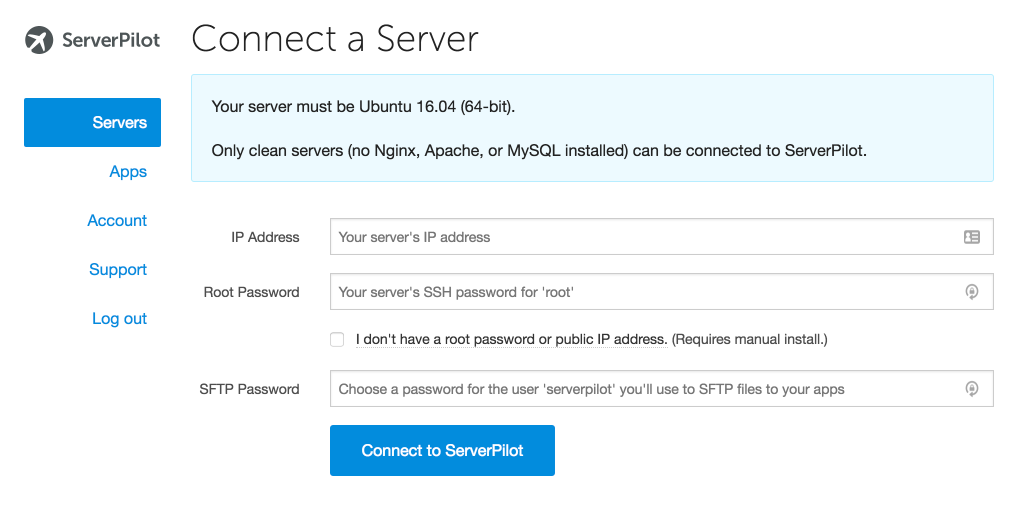
Basically what you need is to create a ServerPilot account, the free one. Then you are already able to configure your first server. I chose Digital Ocean as my VPS provider for my blog, so I created an Ubuntu 16.04 x64 droplet with a root password and nothing installed.
In ServerPilot’s dashboard just add a new server, providing the ip address, the root password and the serverpilot user password you want to use – this will be the user you’ll use to deploy your code later. Then in 45 seconds or less you’ll have your server provisioned with a very well-configured LAMP/LEMP stack.
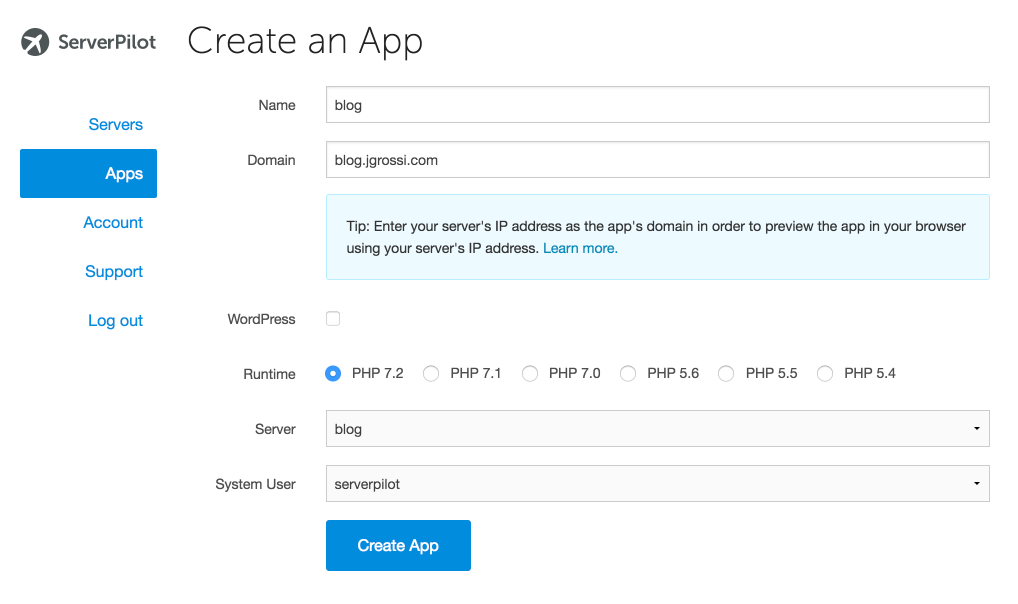
Adding your first app
The next step is to add your first app. You have to inform the app name, in my case just blog, the domain name and check the PHP version you’d like to use with it. The point here is that ServerPilot will create the virtual host entry in NGINX and configure everything you need to make your site working. By default it configures the webroot directory to public, following the best practices we have nowadays.
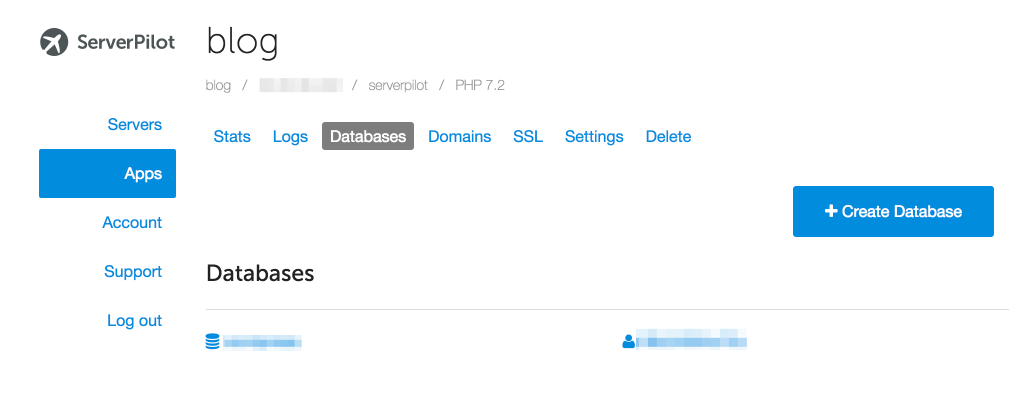
Each app has its specific configurations, like domains and database. So you will see a “database” tab where you can create a new MySQL database, just providing the database name, the username and the user password. BTW it would generate a random username and password for you, improving security. If you want to, keep them.
Now just deploy your app and you should see your app working well. If you want to you can add an IP address as a domain name, so you can also access your app faster then waiting for the domain to propagate.
Tip: as you know, you don’t need to wait for propagation to test your app, just add 123.45.67.89 yourdomain.com to your /etc/hosts file and you’ll able to access your app using the newly configured server. Point your domain to your new server’s IP address.
Adding SSL support
As I wrote before, the free ServerPilot does not allow any easy SSL configuration. You can pay for the next plan ($10 a month per server) and you’ll have SSL support very easily.
For my blog needs, I decided to stay in the free plan but configuring manually the SSL using LetsEncrypt. Once I already had a LetsEncrypt certificate on the previous LAMP server I have to do some tricks to make it work.
First, to generate a LetsEncrypt certificate using the free ServerPilot plan I suggest you to use a simple shell script to make everything working for you. It’s a simple command that’s on GitHub and you can find it here: https://github.com/rehmatworks/serverpilot-letsencrypt.
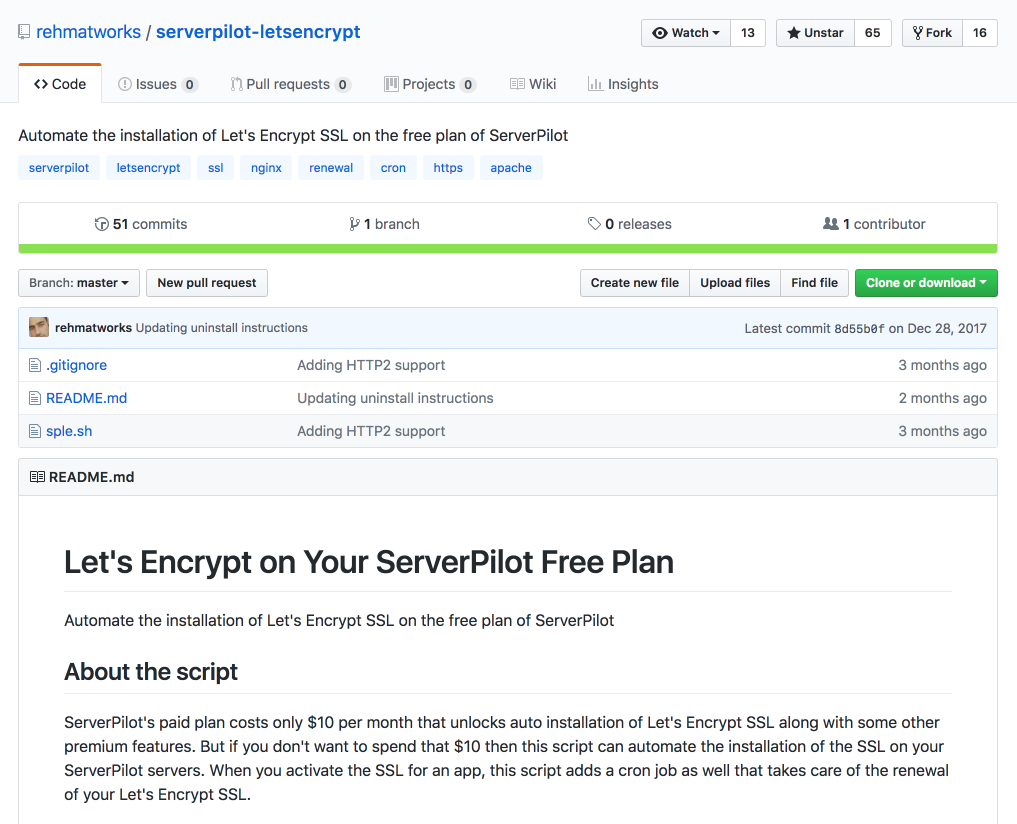
After following the installation instruction you should be able to run the rwssl command as root, and in a few steps, you’ll have a new generated LetsEncrypt certificate for your domain. It gets the SSL certificate automatically by asking you just a few questions, like your site name on ServerPilot – blog in my case. It also configures your virtual hosts to point to the certificates, so you don’t have to worry about nothing, just running the command and done.
root@blog:~# rwssl
What do you want to do with Let's Encrypt? (install/uninstall): install
Enter your domain name (Don't include www): blog.jgrossi.com
Enter your ServerPilot app name: blog
In my case, I already had the certificates, so I have to move them to the new server. I had only to copy the /etc/letsencrypt folder from the old VPS to the new one. But pay attention, you have to maintain all symlinks created, so use for example rsync command to copy all files:
rsync -avz root@123.45.67.89:/etc/letsencrypt/ /etc/letsencrypt/
In this case, I’m on the new server and 123.45.67.89 is the old server IP. So I’m copying files from the old server to the new one.
Using this you would be able to move all files keeping all the symlinks LetsEncrypt created, so once the GitHub package already set the correct path in your NGINX virtual host, copying the files would make everything working easily.
Conclusion
Working with ServerPilot is very easy, and I move my entire blog in less than a hour, following all instructions, reading, etc. So it’s very easy to use and the final result is very interesting. The point here is that you can focus on your app development, and then you can easily configure a PHP environment, without any big effort.
I like the final result, the performance and how the provision works. I can’t say how the provision script was written, but the performance is so much better than a simple LAMP stack, and at $0 cost.
If you need to configure a VPS for a PHP environment give it a try. I’m pretty sure you’ll enjoy the process and the final result. If you want to use my referral code to signup you can get $10 in credits to play with. Hope you like it.